

4.1
Owner's of the Black & Decker Coffeemaker DCM100B gave it a score of 4.1 out of 5. Here's how the scores stacked up:
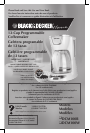

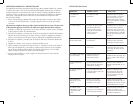
6
5
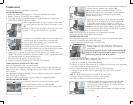
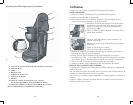
3. To change the time: Press HOUR button until the correct
time appears (E).
Note: When the time passes noon, a small light appears in
the top left corner of the digital display under the P.M. to
let you know you are in P.M. time. If the P.M. indicator is
not lit, the time is set to A.M.
4. Repeat with the MIN button (F). (If minute setting is
not changed within 5 seconds, the clock will revert to
default time and selection of hour and minute must be
repeated.)
Tip: Hold each button down to make the hours and
minutes change rapidly after a short delay. To change the
time in 1 minute increments, press and release the button.
Note: If the unit is unplugged or power is interrupted even momentarily, the time
may need to be reset.
BREWING COFFEE
It is not necessary to set the clock to brew coffee unless you wish to use delayed
brewing.
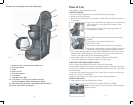
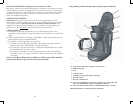
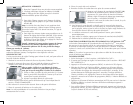
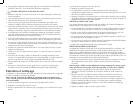
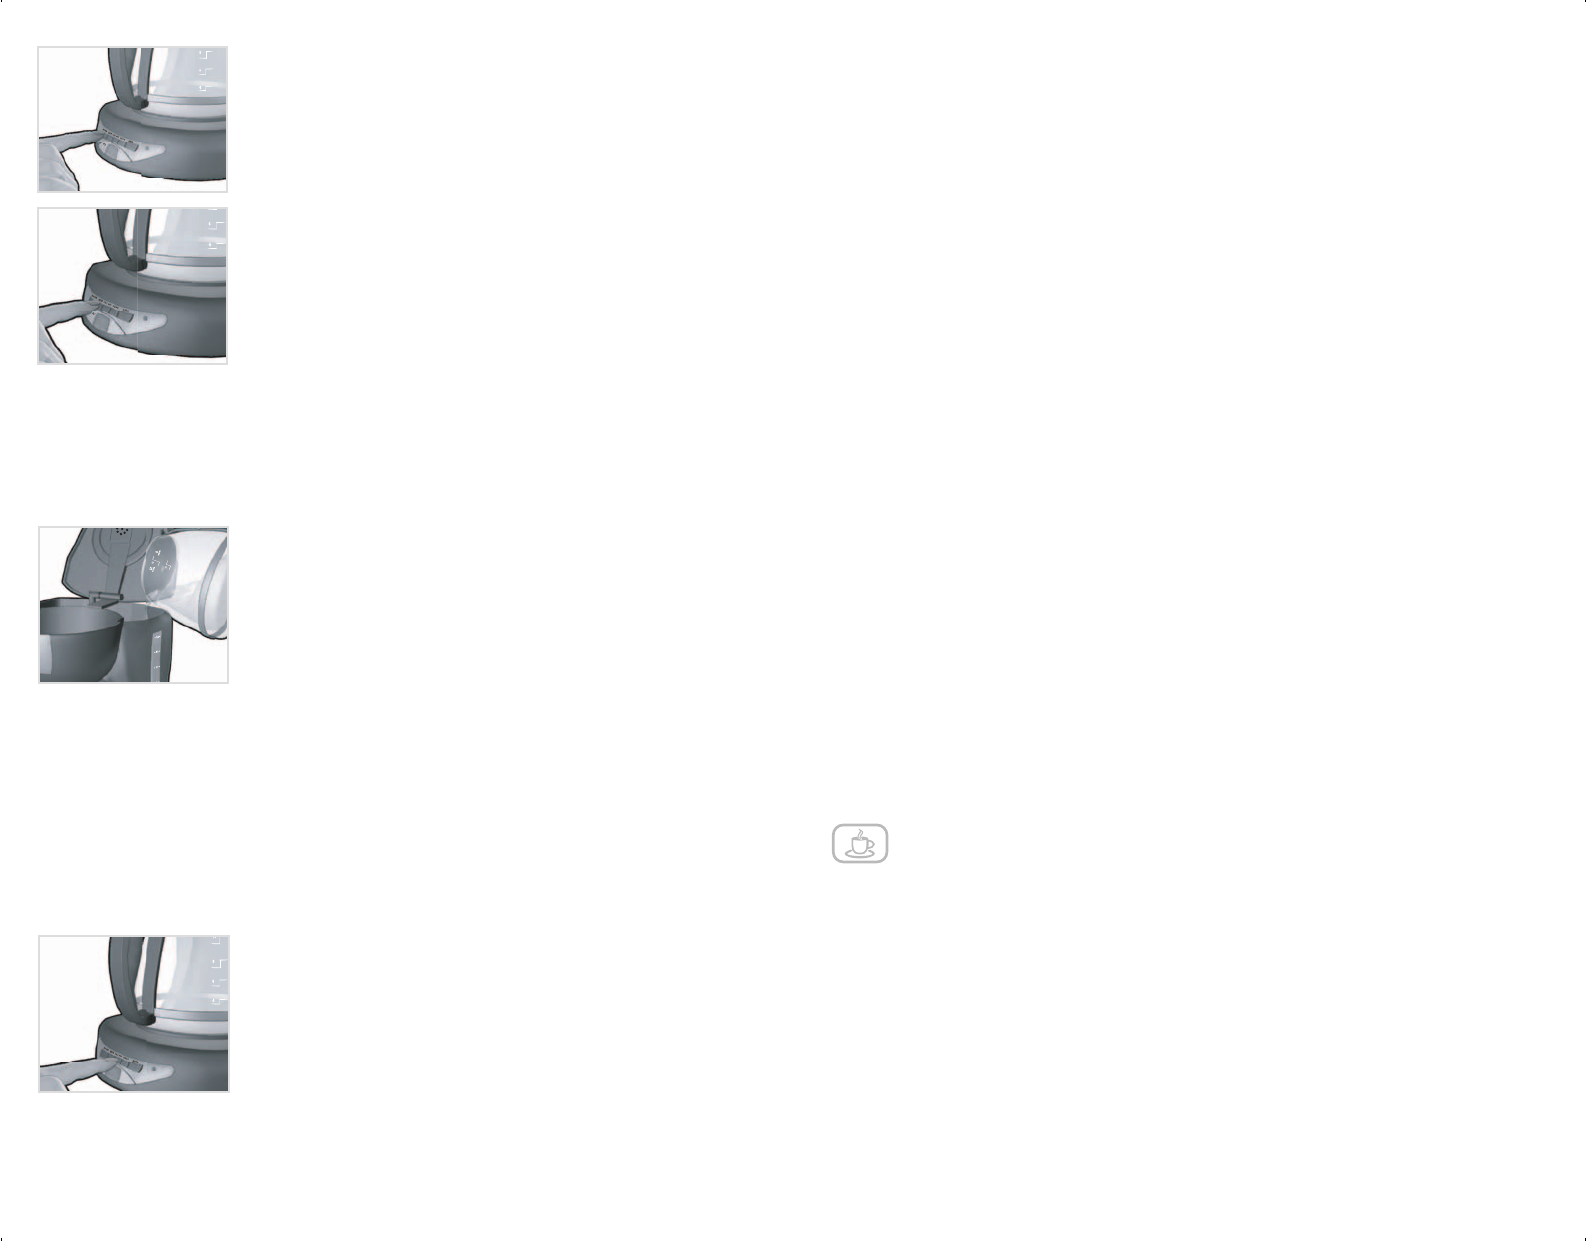
1. Open water reservoir/brew basket cover.
2. Fill water reservoir with desired amount of cold tap
water using water markings on side of reservoir. Do not
exceed the 12-cup maximum level (G).
Caution: Be careful not to exceed the 12-cup maximum
level, to avoid water running out the overflow hole in the
back of the coffeemaker.
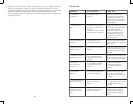
3. Place an 8-12 cup basket style paper filter into the
removable filter basket, making sure filter is centered in
filter basket.
4. Add desired amount of ground coffee.
5. Insert filter basket into brew basket following directions in GETTING STARTED.
6. Close brew basket/ water reservoir cover.
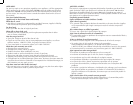
7. Place brew-thru lid on empty carafe.
Note: Coffee may overflow if brew-thru lid is not properly aligned.
8. Place empty carafe on the “Keep Hot” carafe plate.
9. Plug cord into standard electrical outlet.
10. Press ON/OFF button (H); power light is illuminated.
Brewing begins OR, to delay brewing, you may set the
auto function (see for DELAYED BREWING).
11. When coffee stops flowing into carafe, the brew cycle
is complete.
F
E
12. Once coffee grounds have cooled carefully open reservoir/brew basket cover
and using filter basket handle, remove and discard used grounds and paper
filter. Close reservoir/brew basket cover.
13. The coffeemaker will keep brewed coffee hot for 2 hours and then
automatically turn off.
14. To turn off the coffeemaker press the ON/OFF button.
15. Unplug appliance when not in use.
SNEAK-A-CUP
®
INTERRUPT FEATURE
The Sneak-A-Cup
®
interrupt feature allows you to pour a cup of coffee from the
carafe while the coffee is still brewing. When the carafe is removed, the brewing
process is paused. Simply replace the carafe on the carafe plate within 30 seconds
and brewing will resume.
Note: If the carafe is not replaced within 30 seconds the brew basket may
overflow.
DELAYED BREWING
1. Follow steps 1 through 9 under BREWING COFFEE.
2. Make sure clock has been set to correct time of day (see SETTING THE
CLOCK).
3. Press the PROG button; the AUTO light blinks.
4. To select the time for delayed brewing: Press HOUR button until the correct
time appears on the display. Repeat with the MIN button within 5 seconds. (If
minute setting is not changed within 5 seconds, the clock will revert to default
time and selection of hour and minute must be repeated.)
5. Press the PROG button again. The delayed brewing time is set.
6. Press the AUTO button to activate the delayed brewing. The AUTO light is
displayed on the digital display screen.
7. To check the preset auto time, press PROG button and it will display the time
selected for delay brewing to begin. (The AUTO light will blink until the AUTO
button is pressed.)
8. To cancel the AUTO brew, press the ON/OFF button twice. All lights will
turn off.
COFFEE BREWING TIPS
• Stir coffee in carafe before serving to evenly distribute the flavor.
• Coffee that is poured during brewing cycle may vary in strength from the
finished brew.
• Not sure how much coffee to use? Begin by using 1 level scoop of medium
grind coffee for each cup of coffee to be brewed.
• Never reuse coffee filters; they absorb flavors from the brewed coffee and will
give the newly brewed coffee a stale flavor. They may also tear and allow
grinds to drip into the newly brewed coffee.
• Open coffee grounds are best stored in the refrigerator in a tightly sealed
M
A
X
2
G
H


Find Your Products By Category
- TV and Video
- Communications
- Personal Care
- Portable Media
- Computer Equipment
- Home Audio
- Household Appliance
- Car Audio and Video
- Kitchen Appliance
- Fitness & Sports
- Musical Instruments & Equipment
- Power Tools
- Marine Equipment
- Lawn and Garden
- Automotive
- Photography
- Video Game
- Laundry Appliance
- Outdoor Cooking
- Baby
- Cell Phone
Please Login
