

0
Owner's of the Black & Decker Iron Black & Decker Iron gave it a score of 0 out of 5. Here's how the scores stacked up:
4
OPERATING INSTRUCTIONS
WARNING: Shock hazard. Under no circumstances should this product be used near water.
WARNING: Risk of lacerations or burns. Do not touch work piece or accessory
immediately after operating the tool. They can become very hot. Handle carefully. Always allow
accessories and work piece to cool before handling.
WARNING: To reduce the risk of injury, turn off and remove battery from tool or disconnect
plug from power source before making any adjustments or removing or installing attachments or
accessories. Remove any accessory from the attachment before removing or installing the attachment.
NOTE: Refer to Power Unit instruction manual before operating this tool for all safety warnings
and details on installing and removing attachments.
SANDING
Your tool is equipped with a teardrop base which allows you to use it on large flat surfaces and tight
spots or corners. The pad tips may wear unevenly, depending on use. The pads are designed to allow
you to interchange and /or rotate the diamond tip.
• To switch the tool on, press the variable speed switch. The tool speed depends on how far you
press the switch.
• To switch the tool off, release the variable speed switch.
NOTE: This attachment only operates in the forward direction, the forward/reverse slider of the
Power Unit should not be able to be switched to reverse.
NOTE: Do not rest fingers on platen during use. Move it in long sweeping strokes across
the surface, letting it do the work. Light pressure is all that is required for sanding. Excessive
pressure will slow the tool and produce inferior results. Check your work often, product is capable
of removing material rapidly. Excessive force will reduce the working efficiency and cause motor
overload. Replacing the sanding sheet regularly will maintain optimum working efficiency.
NOTE: Always ensure the workpiece is firmly held or clamped to prevent movement. Any
movement of the material may affect the quality of the sanding finish.
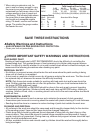
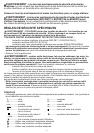
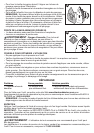
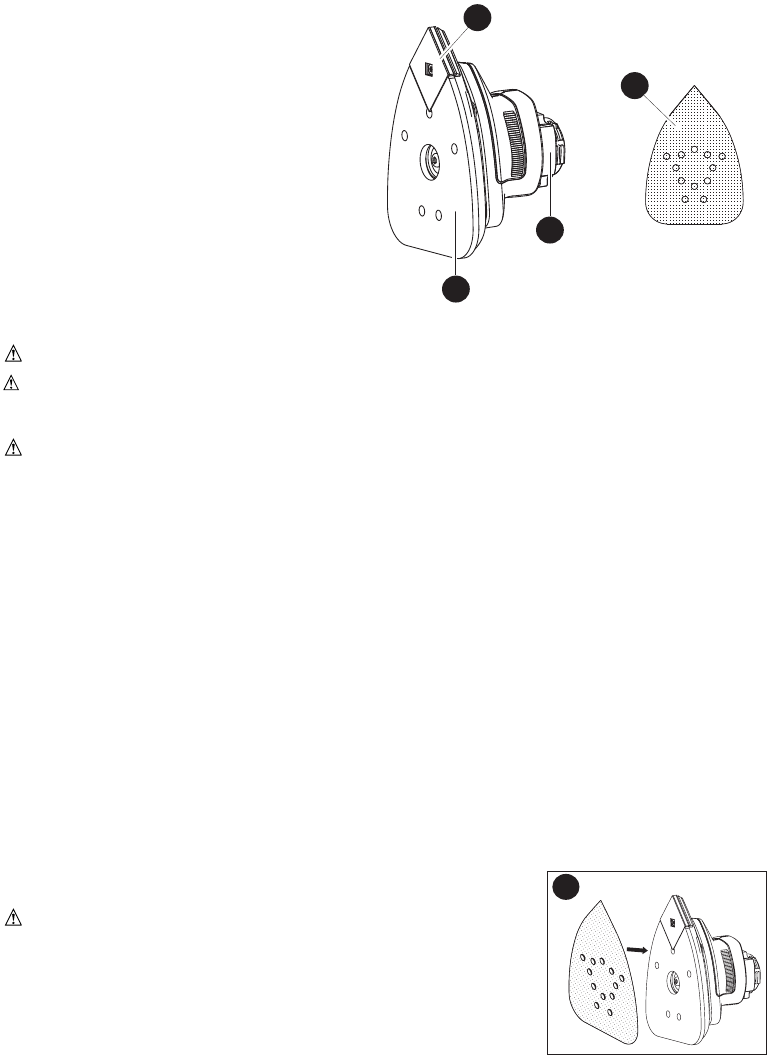
Attaching and removing sanding sheets (Figure A)
The sanding attachment uses pre-cut sanding sheets.
WARNING: To reduce the risk of injury, turn off and remove
battery from tool or disconnect plug from power source before
attaching
or removing sanding sheets.
• Turn off and remove batttery or disconnect tool from power source.
• To attach a sanding sheet, line it up with the sanding base as shown.
• Press the sheet firmly and evenly onto the sanding base.
• To remove the sheet, pull it off the sanding pad.
NOTE: Never use the sanding attachment without a sanding
sheet or accessory in place. Use coarse grit paper to sand rough surfaces, medium grit for
smooth surfaces, and fine grit for the finishing surfaces. If necessary, first make a test run on
scrap material. Allowing the sandpaper to wear away will damage the sanding pad.
A
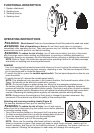
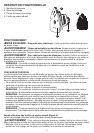
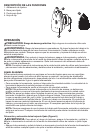
FUNCTIONAL DESCRIPTION
1. Sander attachment
2. Sanding base
3. Sanding base tip
4. Sanding sheet
2
1
3
4


Find Your Products By Category
- TV and Video
- Communications
- Personal Care
- Portable Media
- Computer Equipment
- Home Audio
- Household Appliance
- Car Audio and Video
- Kitchen Appliance
- Fitness & Sports
- Musical Instruments & Equipment
- Power Tools
- Marine Equipment
- Lawn and Garden
- Automotive
- Photography
- Video Game
- Laundry Appliance
- Outdoor Cooking
- Baby
- Cell Phone
Please Login
