
0
Owner's of the Bogen Car Speaker Bogen Communications Car Speaker gave it a score of 0 out of 5. Here's how the scores stacked up:
50 Spring Street, Ramsey NJ 07446
Tel. 201-934-8500, Fax: 201-934-9832
www.bogen.com
Speaker Installation
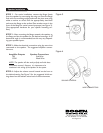
STEP 1 - For easier installation, remove the flange (base)
from the speaker by unscrewing the wing nut. Place the flange
flush with the mounting surface and mark the pivot area using
either a marker or chisel. Drill the appropriately sized hole
and screw the flange to the surface.Place another screw in the
front of the flange for swivel control purposes (see Figure 3).
(Use appropriate hardware for your specific mounting sur-
face.)
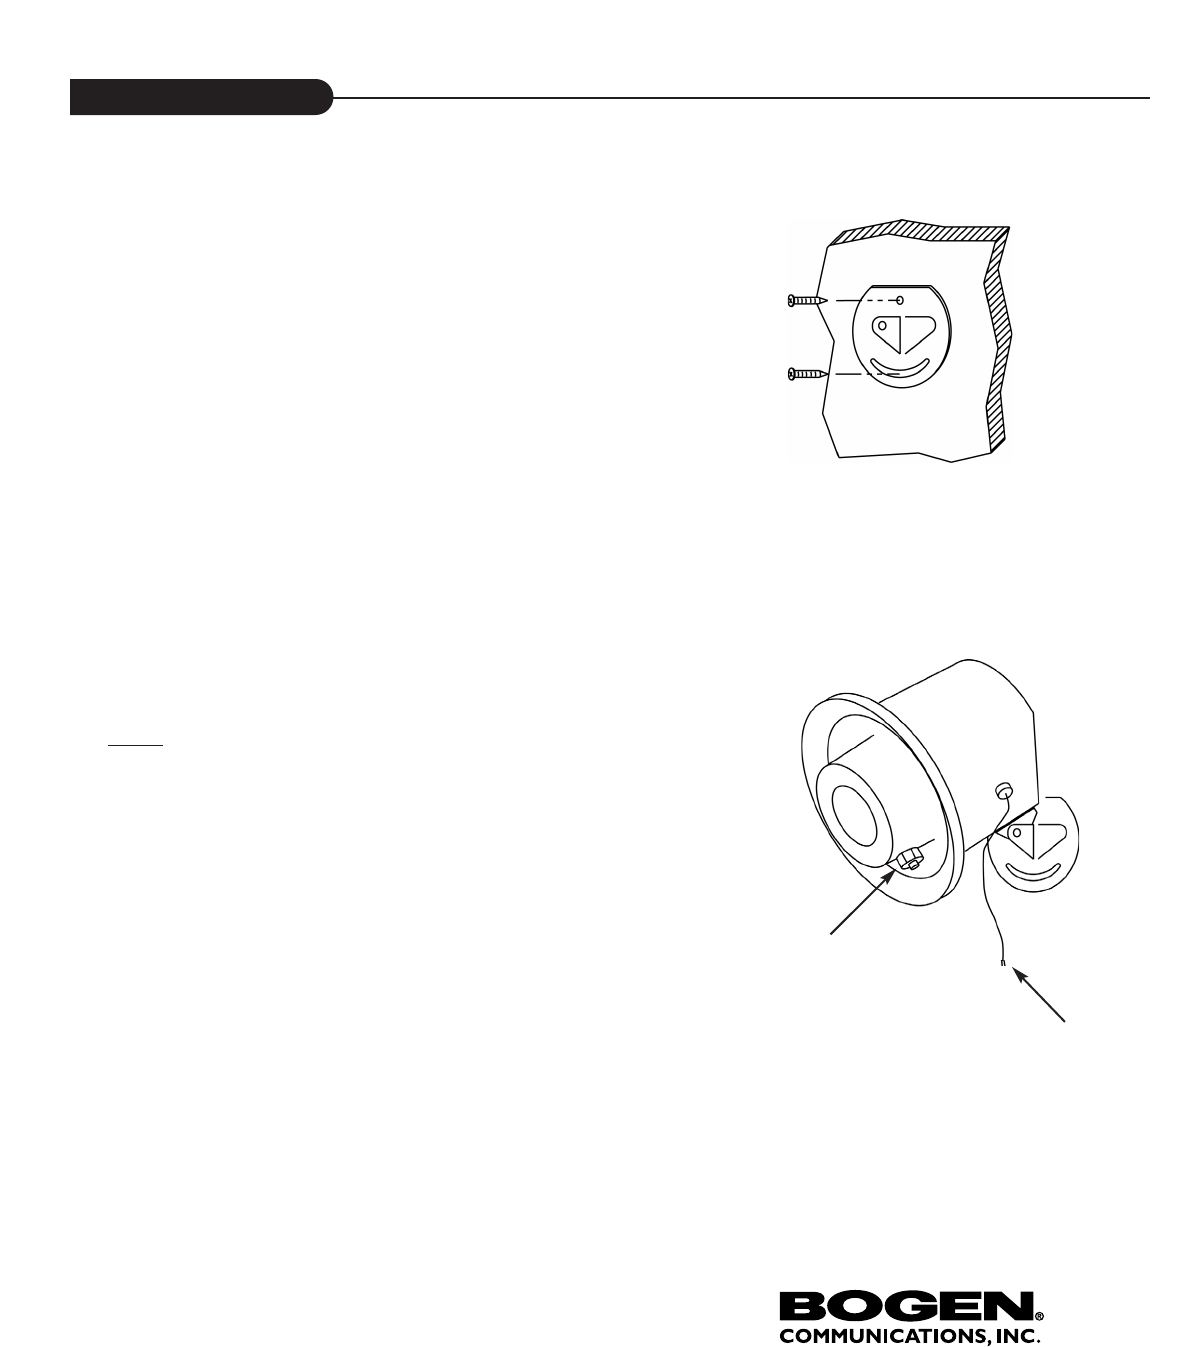
STEP 2 - After mounting the flange, reattach the speaker to
the flange and aim the speaker for the desired coverage. A 45
downward angle is recommended, but this may vary depend-
ing upon speaker layout.
STEP 3 - Make the electrical connection using the two wires
connected to the speaker. The suggested amplifier connec-
tions are:
Amplifier Outputs Speaker Connections
70V Red Wire
COM Black Wire
NO
TE: The speaker will also work perfectly well with these
connections reversed. However, it is important to be
consistent in the wiring of the speakers in the system.
STEP 4 - Adjust the volume control located on the horn to
the desired setting. See Figure 2 for the suggested initial set-
tings based on the ambient noise level of the environment.
Figure 3
Figure 4
VOLUME CONTROL
WIRE CONNECTORS
o


Find Your Products By Category
- TV and Video
- Communications
- Personal Care
- Portable Media
- Computer Equipment
- Home Audio
- Household Appliance
- Car Audio and Video
- Kitchen Appliance
- Fitness & Sports
- Musical Instruments & Equipment
- Power Tools
- Marine Equipment
- Lawn and Garden
- Automotive
- Photography
- Video Game
- Laundry Appliance
- Outdoor Cooking
- Baby
- Cell Phone
Please Login
