
0
Owner's of the Bogen Telephone Accessories TAMB2 gave it a score of 0 out of 5. Here's how the scores stacked up:
A
B
C
C
UNIT 1
UNIT 2
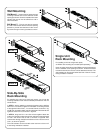
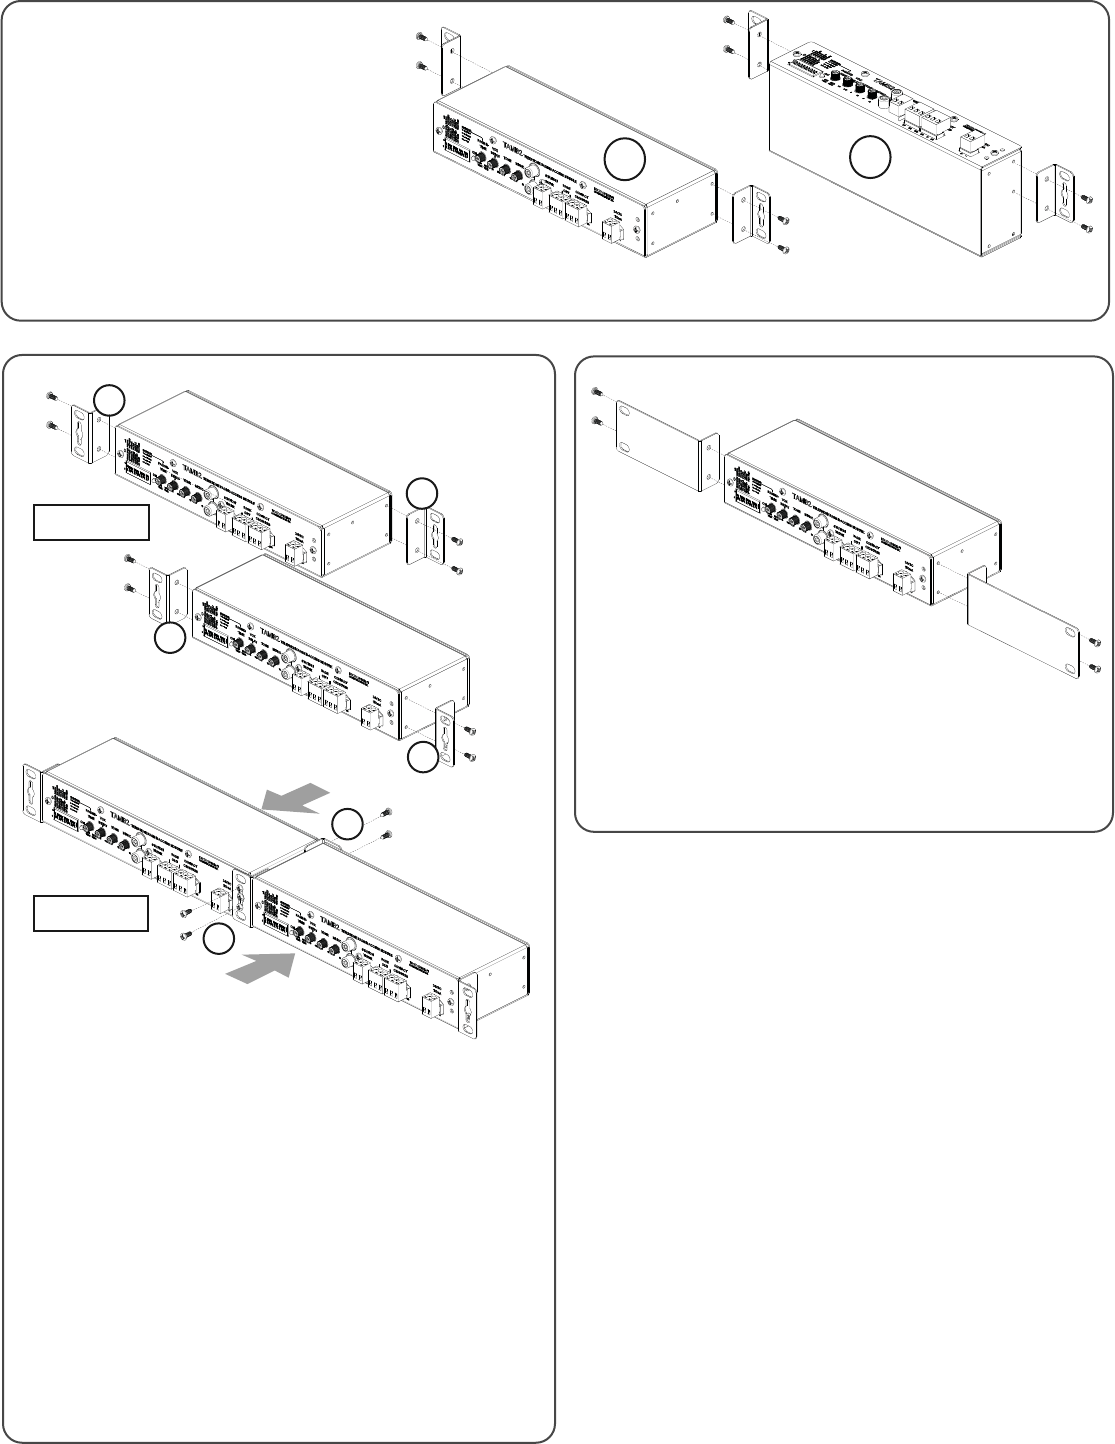
STEP 1
Side-By-Side
Rack Mounting
1
2
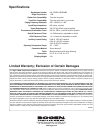
Wall Mounting
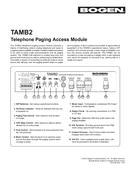
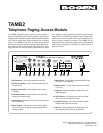
Wall Mount 1 - Insert mounting screws through
mounting brackets and into the side/rear screw
openings as shown. Once the brackets have been
secured, the unit can now be affixed to a wall or
other flat surface.
Wall Mount 2 - The unit can also be secured
to a wall or flat surface with the front face pointing
upwards to provide less cantilever. Insert mount-
ing screws through mounting brackets as shown.
For installing two units into a single rack space, you will use the
mounting brackets of both units to ultimately connect them into one
combined unit.
In STEP 1, start by attaching a mounting bracket onto the left/front
side of Unit 1 as shown in figure A. Then attach a mounting bracket
to the right/rear side of Unit 1, in a reverse manner, as shown in fig-
ure B. Then proceed to attach mounting brackets to both the left and
right/front sides of Unit 2, as shown in figure C.
In STEP 2, bring both Unit 1 and Unit 2 flush together. Attach the
units by first inserting screws through the right/rear mounting bracket
on Unit 1 and into the rear of Unit 2, as shown in figure D. Then
insert screws through the left/front bracket on Unit 2 into the front of
Unit 1, as shown in figure E.
The side brackets can be mounted at the back end of the unit if
a rear facing orientation is desired.
D
E
UNIT 1
UNIT 2
STEP 2
Single Unit
Rack Mounting
For installing a unit into a single rack space,
an RPK91 rack mounting kit is needed (sold separately).
Insert mounting screws through the RPK91 mounting brackets and
into the side/rear screw openings as shown. Once the brackets
have been secured, the unit can now be attached to the rack. The
side brackets can be mounted at the back end of the unit if a rear
facing orientation is desired.


Find Your Products By Category
- TV and Video
- Communications
- Personal Care
- Portable Media
- Computer Equipment
- Home Audio
- Household Appliance
- Car Audio and Video
- Kitchen Appliance
- Fitness & Sports
- Musical Instruments & Equipment
- Power Tools
- Marine Equipment
- Lawn and Garden
- Automotive
- Photography
- Video Game
- Laundry Appliance
- Outdoor Cooking
- Baby
- Cell Phone
Please Login
