

0
Owner's of the Bushnell Binoculars ImageView gave it a score of 0 out of 5. Here's how the scores stacked up:


15
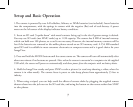
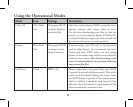
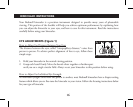
Transferring e Photos & Videos to Your PC continued
7. You’re now ready to open the photo files in any photo editing software. Just use File>Open and go to the folder
where you stored the photos earlier. If you are using PhotoSuite, select File>Open Photo, then use the “Look in”
pull down menu at the top of the Open window, select “My Computer”, select your hard drive, and double click
any photo in the folder where you copied the files from the camera. It is also possible to open and work with your
photos directly from the ImageView while it is still connected.To do this with PhotoSuite, first follow steps 1-3,
then open PhotoSuite, select File>Open Photo and use the “Look in” menu to select My Computer, then select
the “Removable Disk”, and open the folders inside until you get to the JPEG photo files. If you choose to work
this way, from a connected camera, be sure that you save the photo (when you are done editing) to your hard drive,
and not the camera’s memory or card. To do this in PhotoSuite, after clicking “Done”, answer “Save Changes?”
with “Yes”, but then answer “Replace Existing File”? with “No” and use the “Save As” dialog box to save the edited
photo in a folder on your hard drive (“Save In>Local Disk”), not the “Removable Disk” (camera).
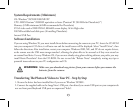
8. If you are new to photo editing on a computer, consult your software’s Help menu (PhotoSuite has extensive
built-in Help) for tips on using its features. Along with adjusting the brightness, contrast, sharpness and color
of your photos, you can resize the photo to fit the paper if you are printing, or save a smaller, low or medium
resolution version for email or inserting into documents. When you are ready to save your edited file, you may
want to use “Save As” and give it a more descriptive name than “IMG___”. Doing this also preserves the original
file as a backup to reopen and re-edit later. Make sure you have successfully transferred all the photos you wanted
to save before using “Delete All” on your camera to make room for new images.


Find Your Products By Category
- TV and Video
- Communications
- Personal Care
- Portable Media
- Computer Equipment
- Home Audio
- Household Appliance
- Car Audio and Video
- Kitchen Appliance
- Fitness & Sports
- Musical Instruments & Equipment
- Power Tools
- Marine Equipment
- Lawn and Garden
- Automotive
- Photography
- Video Game
- Laundry Appliance
- Outdoor Cooking
- Baby
- Cell Phone
Please Login
