

0
Owner's of the Canon Digital Camera Eos Rebel T3i Digital Slr Camera gave it a score of 0 out of 5. Here's how the scores stacked up:


265
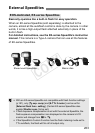
With a commercially-available Eye-Fi card already set up, you can
automatically transfer captured images to a personal computer or
upload them to an online service via a wireless LAN.
The image transfer is a function of the Eye-Fi card. For instructions on
how to set up and use the Eye-Fi card or to troubleshoot any image
transfer problems, refer to the Eye-Fi card’s instruction manual or
inquire the card’s manufacturer.
The camera is not guaranteed to support Eye-Fi card
functions (including wireless transfer). In case of an issue
with an Eye-Fi card, please check with the card manufacturer.
Also note that approval is required to use Eye-Fi cards in
many countries or regions. Without approval, use of the card
is not permitted. If it is unclear whether the card has been
approved for use in your area, please check with the card
manufacturer.
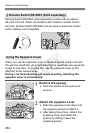
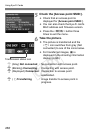
1
Insert an Eye-Fi card. (p.29)
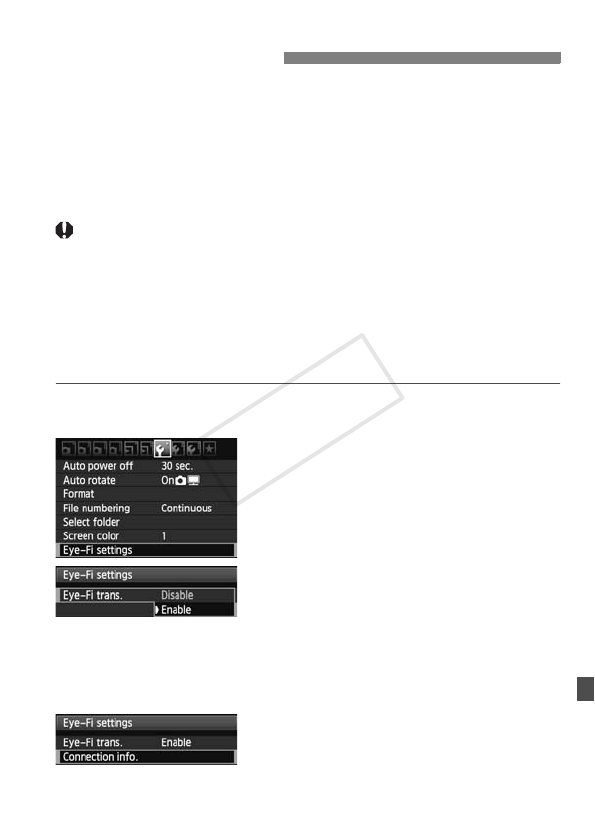
2
Select [Eye-Fi settings].
Under the [5] tab, select [Eye-Fi
settings], then press <0>.
This menu is displayed only when an
Eye-Fi card has been inserted into
the camera.
3
Enable the Eye-Fi transmission.
Press <0>, set [Eye-Fi trans.] to
[Enable], then press <0>.
If you set [Disable], automatic
transmission will not occur even with
the Eye-Fi card inserted
(Transmission status icon I).
4
Display the connection
information.
Select [Connection info.], then press
<0>.
Using Eye-Fi Cards
COPY


Find Your Products By Category
- TV and Video
- Communications
- Personal Care
- Portable Media
- Computer Equipment
- Home Audio
- Household Appliance
- Car Audio and Video
- Kitchen Appliance
- Fitness & Sports
- Musical Instruments & Equipment
- Power Tools
- Marine Equipment
- Lawn and Garden
- Automotive
- Photography
- Video Game
- Laundry Appliance
- Outdoor Cooking
- Baby
- Cell Phone
Please Login
