
0
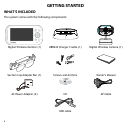
Owner's of the Uniden Baby Monitor Uniden Baby Monitor gave it a score of 0 out of 5. Here's how the scores stacked up:
9
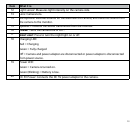
If any items are missing or damaged, contact our Customer Care Line immediately.
Never use damaged products!
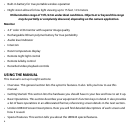
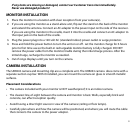
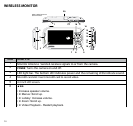
MONITOR INSTALLATION
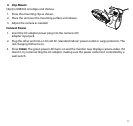
1. Place the monitor in a location with clear reception from your camera(s).
2. If you are using the monitor as a stand-alone unit, flip out the stand on the back of the monitor
and extend the antenna. Connect an AC adapter to the power input on the side of the receiver.
If you are using the monitor in the cradle, insert it into the cradle and connect an AC adapter to
the input jack on the back of the cradle.
3. Plug the power plug into a 120 volt AC (standard indoor) power outlet or surge protector.
4. Press and hold the power button to turn the unit on or off. Let the monitor charge for 6 hours
prior to first time use so the built-in rechargeable monitor battery is fully charged. DO NOT
remove the power cable from the monitor/cradle during the initial charge process. After the
initial charge, recharge the monitor as needed.
5.
Out of range
displays until you turn on the camera.
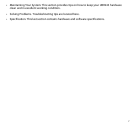
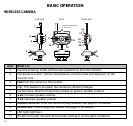
CAMERA INSTALLATION
The UBR243 camera and mounting clip are a complete unit. The UBR243 camera does come with a
separate suction cup bar. With it installed, you can mount the camera on glass or smooth metallic
surfaces.
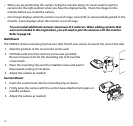
Placement Considerations
• The camera included with your monitor is NOT weatherproof; it is an indoor camera.
• The clearest line-of-sight between the camera and monitor is best. Walls, especially brick and
concrete, can affect reception quality.
• Avoid having a direct light source in view of the camera (ceiling or floor lamps).
• Carefully plan where and how the camera will be positioned, and where you will route the cable
that connects the camera to the power adapter.


Find Your Products By Category
- TV and Video
- Communications
- Personal Care
- Portable Media
- Computer Equipment
- Home Audio
- Household Appliance
- Car Audio and Video
- Kitchen Appliance
- Fitness & Sports
- Musical Instruments & Equipment
- Power Tools
- Marine Equipment
- Lawn and Garden
- Automotive
- Photography
- Video Game
- Laundry Appliance
- Outdoor Cooking
- Baby
- Cell Phone
Please Login
