

4.4
Owner's of the Uniden Baby Monitor UBW2101 gave it a score of 4.4 out of 5. Here's how the scores stacked up:
7
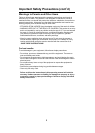
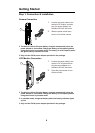
Getting Started (cont’d)
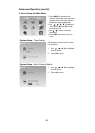
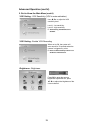
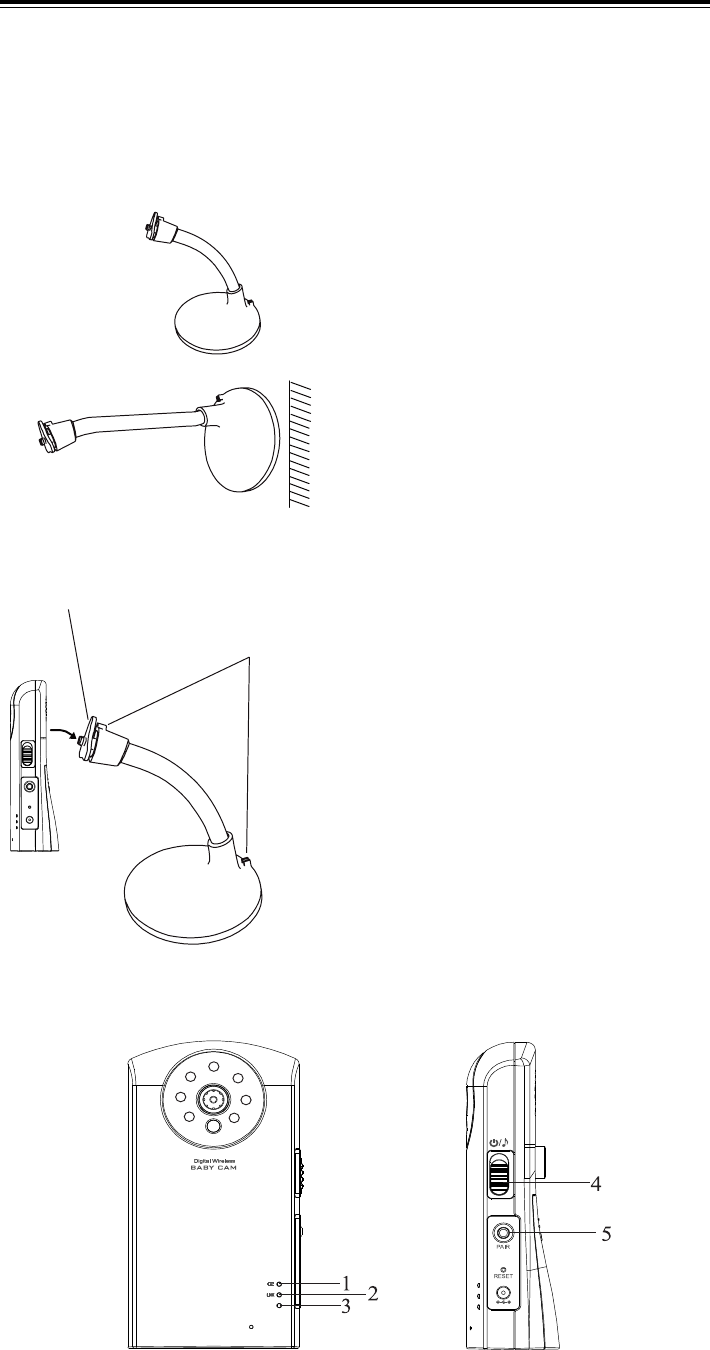
Installing the Camera on the Goose Neck Mount Stand
Use the goose neck mount stand to install the camera at an appropriate angle
in a semi-permanent (desktop mount option) or permanent (wall mount option)
location.
# Ensure the install location is within range of a standard 120 V AC wall
outlet.
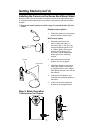
Lock Nut
Cord Guides
Desktop mount option
1. Select the position for the camera
and secure the camera stand.
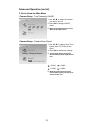
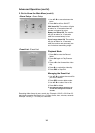
Wall mount option
1. Select the position for the
mount stand and mark out
the mount holes. The two wall
screws should be spaced 1-5/8
in. (40mm) apart. Screws and
anchors are supplied, but if
necessary, use an appropriate
screw type for the mounting
surface.
2. Mount the camera onto the
bracket, but do not tighten.
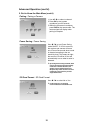
3. Adjust the camera to the proper
view angle. Make sure the lens
is upright relative to your subject,
then tighten the lock nut to secure
the camera.
4. Connect the AC adapter, and
route the cord along the guides in
the stand.
5. At the LCD monitor, adjust the
antenna to an upright position.
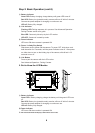
Step 2: Basic Operation
I. Get to Know The Camera
DC IN 5V/1A
PWR.


Find Your Products By Category
- TV and Video
- Communications
- Personal Care
- Portable Media
- Computer Equipment
- Home Audio
- Household Appliance
- Car Audio and Video
- Kitchen Appliance
- Fitness & Sports
- Musical Instruments & Equipment
- Power Tools
- Marine Equipment
- Lawn and Garden
- Automotive
- Photography
- Video Game
- Laundry Appliance
- Outdoor Cooking
- Baby
- Cell Phone
Please Login
