
3.2
Owner's of the Jensen MP3 Player SMP-2GBL gave it a score of 3.2 out of 5. Here's how the scores stacked up:
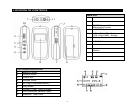

- 4 -
BATTERY POWER AND WARNINGS
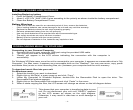
Installing/Replacing battery
1. Open the Battery Compartment Cover.
2. Insert 1 x DC1.5V “AAA” (UM-4) size according to the polarity as shown inside the battery compartment.
3. Close the Battery Compartment Cover.
Battery Warnings
- If the unit is not to be used for an extended period of time, remove the batteries.
- Old or leaking batteries can cause damage to the unit and may void the warranty.
- Replace the batteries when the unit stops operating properly.
- Remove exhausted battery from the unit promptly.
- Use only fresh batteries of the required size and recommended type.
- The supply terminals are not to be short-circuited.
- Battery must be inserted with the correct polarity.
- Do not dispose of batteries in fire, batteries may explode or leak.
DOWNLOADING MUSIC TO YOUR UNIT
Connecting to your Personal Computer:
1. Connect the unit to your computer USB port using the provided USB cable.
2. The unit will turn itself on automatically.
3. “Ready” will appear in the LCD screen indicating the connection with the computer is
successfully.
For Windows XP/Vista users, once the unit is connected to your computer, it appears as a removable drive in “My
Computer”. For Mac users, it appears as a removable drive on the “Desktop”. You can now move, copy, paste
and delete files (music or voice recording files, etc.) between your computer and the unit’s memory.
To download music files into your unit:
For Windows users:
1. Select the track(s) you want to download.
2. Right-click on the file(s), a menu pops up and click “Copy”.
3. Under My Computer or Windows Explorer, double-click the Removable Disk to open the drive. The
Removable Disk window appears.
4. Right-click on the Removable Disk window and click “Paste” in the menu.
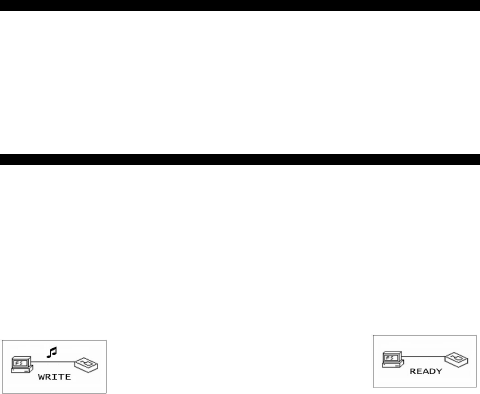
5. When it starts copying the files, the LCD screen will change as shown on the left diagram below.
This shows that your computer is transferring data to your
unit. Do not disconnect your unit until “READY” appears
on the LCD screen as shown on the right diagram.
Otherwise, it may result in data loss or even damage to
your unit.


Find Your Products By Category
- TV and Video
- Communications
- Personal Care
- Portable Media
- Computer Equipment
- Home Audio
- Household Appliance
- Car Audio and Video
- Kitchen Appliance
- Fitness & Sports
- Musical Instruments & Equipment
- Power Tools
- Marine Equipment
- Lawn and Garden
- Automotive
- Photography
- Video Game
- Laundry Appliance
- Outdoor Cooking
- Baby
- Cell Phone
Please Login
