
0
Owner's of the Magnavox Model Vehicle 26ME402V gave it a score of 0 out of 5. Here's how the scores stacked up:

English
8
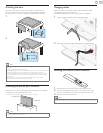
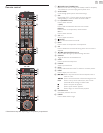
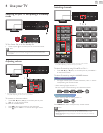
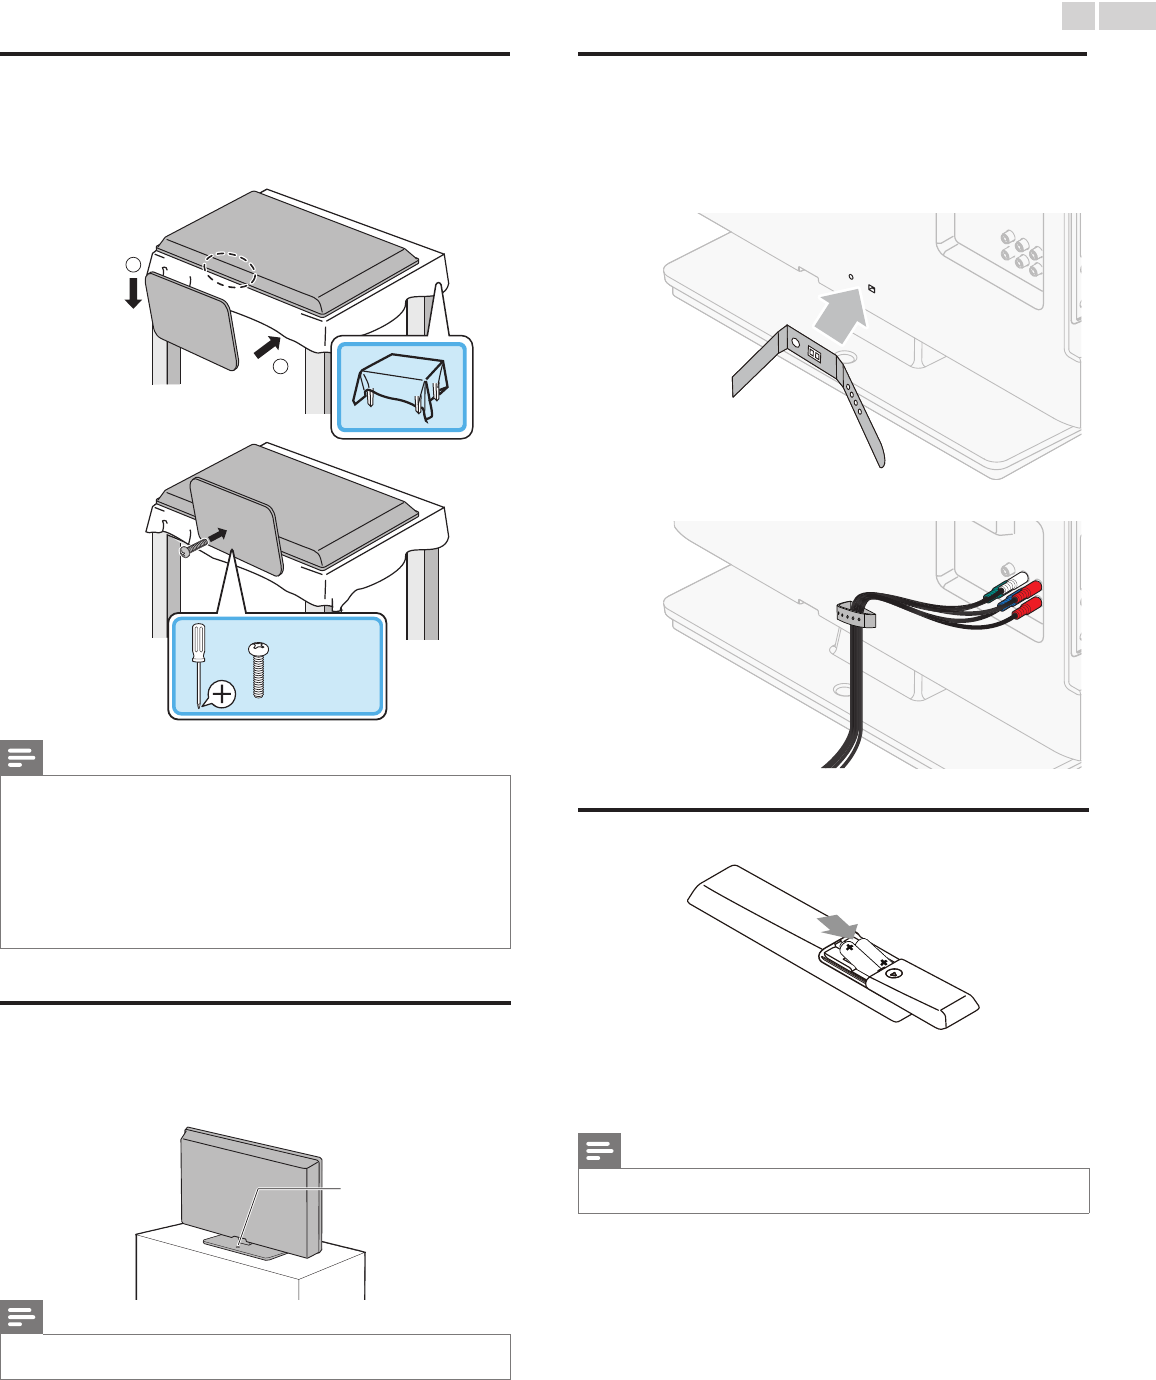
Attachingthebase
You must attach the base to the unit to have it as a table top unit.
Be sure the front and rear of the base match the proper direction.
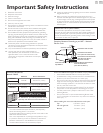
For large screen TVs, at least 2 people are required for these steps.
1
2
1
1
2
2
2
1
1
2
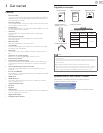
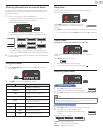
19"/22"
x
2
26"–39"
x
3
Note
• Make sure to use a table which can support the weight of this unit and is larger than
this unit.
• Make sure the table is in a stable location.
• When attaching the base, ensure that “FRONT” with “arrow” written on the bottom of
the base is downward. If it’s not downward, the 2 hooks don’t t into the base.
• When attaching the base, ensure that all screws are tightly fastened. If the base is not
properly attached, it could cause the unit to fall, resulting in injuries as well as damage
to the unit.
• To remove the base from this unit, unscrew the Phillips head screws in step 2.
Be careful not to drop the base when you remove it.
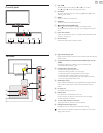
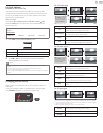
Mountingtheunitonyourfurniture
Screw this unit on your furniture tightly using wood screw (not supplied)
in the hole at the back of the base as shown.
• Recommended screw dimension : 3/16 x 3/4 inches (5.1 x 20 mm)
screwhole
rearofthisunit
Note
• When you remove this unit make sure to unscrew the wood screw from your Wood
Stand, Furniture and other wood item.
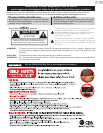
Managingcables
Route your antenna cable and all other cables through the cable
management tie at the back of the TV.
The holder helps keep your cables tidy and easily manageable.
1 Attach the cable management tie as illustrated below.
2 Pass cables through the cable management tie to avoid tangles.
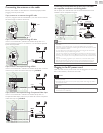
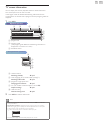
Installingtheremotecontrolbatteries
1 Slide the battery cover off the back of the remote control.
2 Insert the 2 supplied batteries (AAA, 1.5V). Be sure the + and −
ends of the batteries line up with the markings inside the case.
3 Slide the cover back into position.
Note
• Remove the batteries if not using the remote control for an extended period of time.


Find Your Products By Category
- TV and Video
- Communications
- Personal Care
- Portable Media
- Computer Equipment
- Home Audio
- Household Appliance
- Car Audio and Video
- Kitchen Appliance
- Fitness & Sports
- Musical Instruments & Equipment
- Power Tools
- Marine Equipment
- Lawn and Garden
- Automotive
- Photography
- Video Game
- Laundry Appliance
- Outdoor Cooking
- Baby
- Cell Phone
Please Login
