
0
Owner's of the Chamberlain Intercom System NDIS gave it a score of 0 out of 5. Here's how the scores stacked up:
3
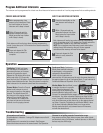
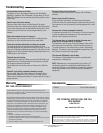
ADD TO AN EXISTING NETWORK
Press the Learn button on the
new intercom until a beep is
heard.
Each intercom will emit a tone when entering programming
mode. It may take up to 3-1/2 minutes for a secure network to
be established. Repeat for any additional intercoms.
NOTE: Do not program new intercoms to each other before
adding them to the network or they will form a separate
network and the memory will need to be cleared.
Press and release the Talk
button to verify network is
complete.
VOLUME
MONITOR
CHANNEL
HOLD
OFF
ACTIVE
TALK
13
2 4
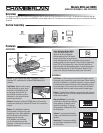
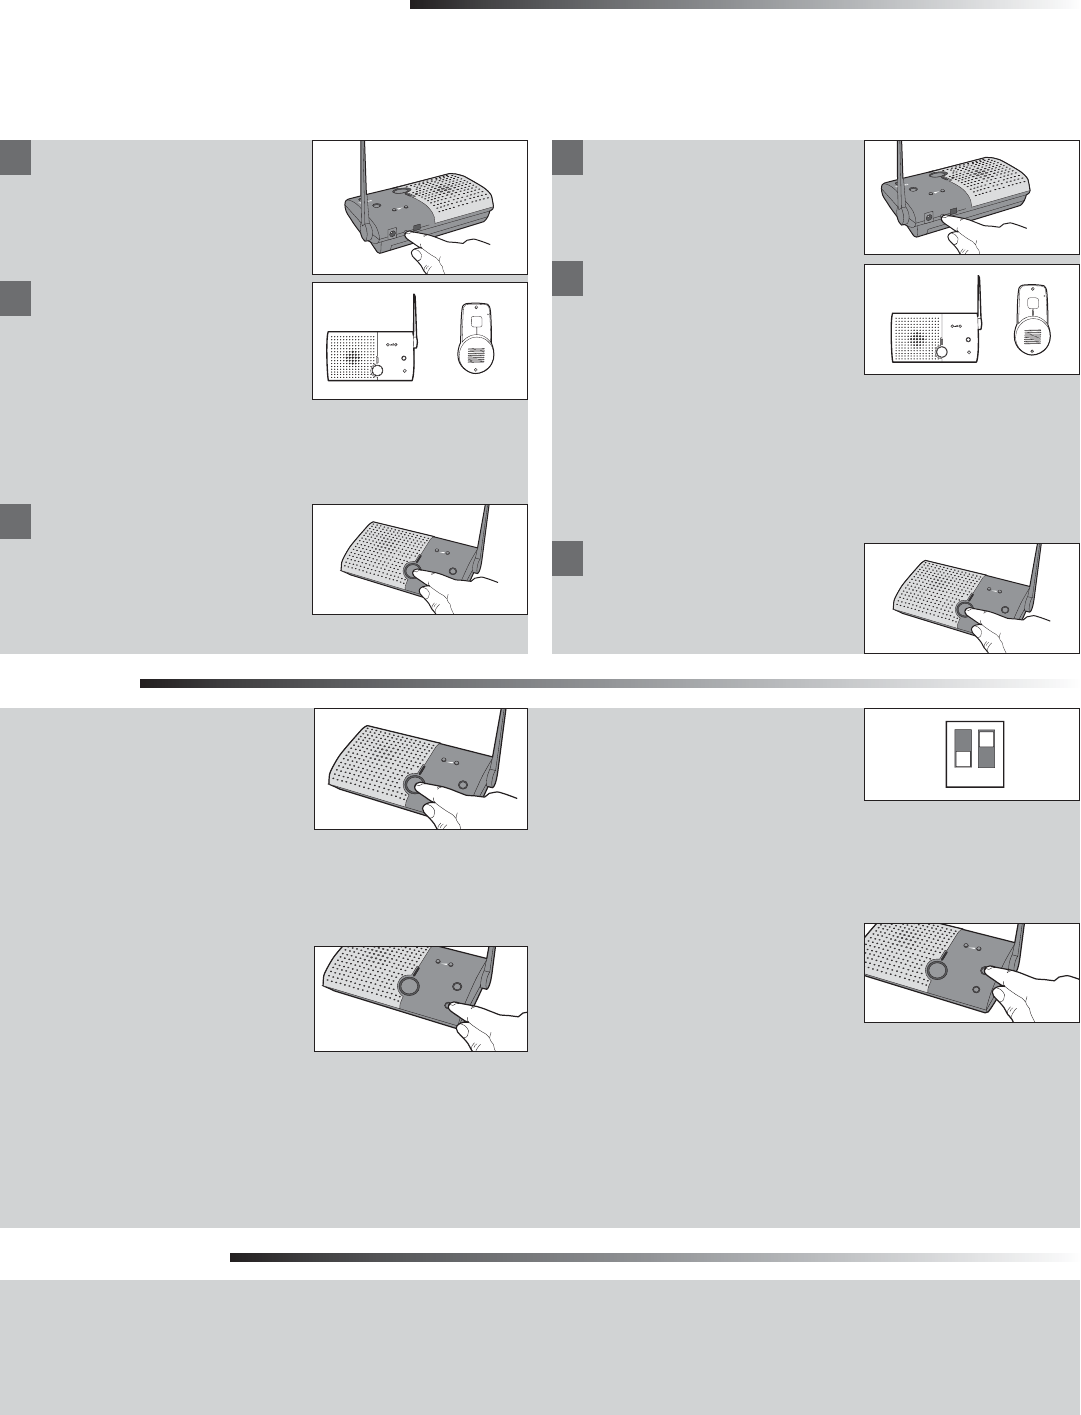
Operation
Talk Button: To talk, hold down
the Talk button. All intercoms in
the network that are on the same
channel will receive the signal.
Release the Talk button when done
talking and within 10-15 seconds
press and hold the Talk button of a different intercom to make a
secure channel between the two. Once the channel is made the
other intercoms in the network cannot hear the conversation.
Channel Button: Press the Channel
button to set intercom to one of
four secure channels or the paging
channel. The default channel for
the intercom is the paging channel
where all four channel lights are
lit. An intercom on a channel can
only hear an intercom on the same
channel or on the paging channel.
VOLUME
MONITOR
CHANNEL
HOLD
OFF
ACTIVE
TALK
13
2 4
VOLUME
MONITOR
CHANNEL
HOLD
OFF
ACTIVE
TALK
13
2 4
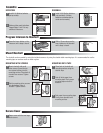
Conference Mode: Conference
Mode allows multiple intercoms
to participate in a conversation
compared to Normal Mode in
which only two intercoms can
communicate. All intercoms must be set to the same channel or
the paging channel to be in Conference Mode. To put intercom in
Conference Mode set Dipswitch #2 to UP position.
Monitor Mode: Monitor Mode is used
to monitor the noise in a specific
room. Place the intercom in the
room that is to be monitored and
press the Monitor button until a tone
is heard. For extended Monitor usage, consider using a plug-in
transformer. Any other networked intercom can listen to that
room. If a specific channel is selected for Monitor Mode then
only other intercoms on that channel or on the paging channel
can listen. Press the Talk button to exit Monitor Mode. A tone
will be heard indicating Monitor Mode is no longer active.
Monitor mode functions only between base unit intercoms,
not with the doorbell unit.
VOLUME
MONITOR
CHANNEL
HOLD
OFF
ACTIVE
TALK
13
2 4
HOLD
ACTIVE
TALK
13
24
VOLUME
MONITOR
CHANNEL
OFF
Within 10 seconds put any
networked intercom into Learn
Mode (press the Learn button
until a beep is heard).
MONITOR
HOLD
OFF
1
3
2
4
VOLUME
TALK
ACTIVE
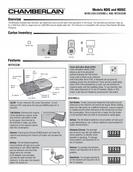
Program Additional Intercoms
12
Troubleshooting
Intercom does not function.
Check batteries in intercom. If using a DC Adapter ensure that it
is plugged in.
Ensure intercom is connected to a network. See Program.
Ensure that intercoms are on the same channel. See Operation.
The intercom can be programmed to at least one other intercom to become a network or it can be programmed into an existing network.
CREATE NEW NETWORK
Before programming, clear
memory on all intercoms. Press
the Learn button on the new
intercom until a beep is heard.
Each intercom will emit a tone when entering programming
mode. It may take up to 3-1/2 minutes for a secure network to
be established.
MONITOR
HOLD
OFF
1
3
2
4
VOLUME
TALK
ACTIVE
HOLD
ACTIVE
TALK
13
24
VOLUME
MONITOR
CHANNEL
OFF
Within 10 seconds put the
second intercom into Learn
Mode (press the Learn button
until a beep is heard).
Press and release the Talk
button to verify network is
complete.
VOLUME
MONITOR
CHANNEL
HOLD
OFF
ACTIVE
TALK
13
2 4
Intercom is not getting expected transmission range.
Keep antenna vertical. Keep intercom away from metal objects
and electrical wiring. Cell phones, cordless phones, or other radio
devices may also limit range.
1
2
3
1
2
3


Find Your Products By Category
- TV and Video
- Communications
- Personal Care
- Portable Media
- Computer Equipment
- Home Audio
- Household Appliance
- Car Audio and Video
- Kitchen Appliance
- Fitness & Sports
- Musical Instruments & Equipment
- Power Tools
- Marine Equipment
- Lawn and Garden
- Automotive
- Photography
- Video Game
- Laundry Appliance
- Outdoor Cooking
- Baby
- Cell Phone
Please Login
