

0
Owner's of the Bushnell Telescope Image View gave it a score of 0 out of 5. Here's how the scores stacked up:


10
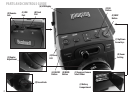
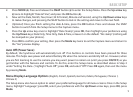
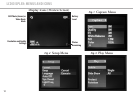
Setting the Diopter Adjustment
Before you begin taking photos, a simple, one-time adjustment should be made to ensure that you can get
sharp photos of any subject once you have it focused as you view it normally through the scope’s eyepiece.
This process will compensate for any variations in the eyesight or vision of the individual user:
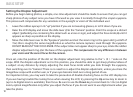
Leave the rubber eyecup in its “up” position if you are not wearing glasses, or roll it down if you are. 1.
Raise the LCD display and move the slide lever 2. (F) to the “Camera” position. Point the scope at a distant
object (preferably one containing ne detail such as a tree or sign), and adjust the focus knob (O) until it
appears as sharp as possible on the display.
Move the slide lever over to the “Eyepiece” position and set the zoom ring to the green dot (just left of 3.
15x)-this is roughly the same magnication as what the camera captures. Look through the eyepiece.
DO NOT READJUST THE FOCUS KNOB. If the subject does not appear sharp to your eye, rotate the rubber
diopter adjustment ring (J) at the base of the eyepiece. This compensates for any dierence in between
your vision and the correct focus for the camera.
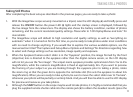
Once set, note the position of the dot on the diopter adjustment ring relative to the “+ /0 / -” scale on the
scope. With the diopter adjustment set to this position, you should be able to get sharp photos/videos of
a subject at any distance by simply adjusting the main focus knob while you look through the eyepiece,
then switching over to “Camera”. There is no need to re-adjust the diopter adjustment, unless you share the
ImageView scope with another user, or if your eyes become tired over a long period of use.
For important shots, you may want to take the precaution of double checking focus on the LCD display too.
If you are having trouble ne tuning focus when viewing the LCD, try pressing the Up arrow key to zoom in
(up to 4x digital zoom is available), then focus. Be sure to use the Down key to zoom back to 1.0x (no digital
zoom, optical magnication only) after you adjust the focus if you do not want to use digital zoom when you
take the photo.
BASIC SETUP


Find Your Products By Category
- TV and Video
- Communications
- Personal Care
- Portable Media
- Computer Equipment
- Home Audio
- Household Appliance
- Car Audio and Video
- Kitchen Appliance
- Fitness & Sports
- Musical Instruments & Equipment
- Power Tools
- Marine Equipment
- Lawn and Garden
- Automotive
- Photography
- Video Game
- Laundry Appliance
- Outdoor Cooking
- Baby
- Cell Phone
Please Login
