

0
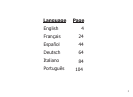
Owner's of the Bushnell Telescope Image View gave it a score of 0 out of 5. Here's how the scores stacked up:


8
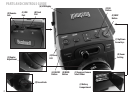
BASIC SETUP
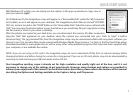
Loading Batteries
Slide the battery cover (I) open in the direction indicated by the arrow, then swing it out to the right. Insert
2 AAA Alkaline or Lithium batteries into the compartment in the direction indicated inside, then replace the
cover, sliding it back into place until it clicks. Note: Rechargeable NiMh type batteries may also be used, but
some may not deliver adequate current to power the camera and display.
Inserting An SD Card
The camera can store from about 11 (at 5MP resolution and “Best” quality) up to over 100 photos in the
internal memory, depending on resolution and quality settings. To expand the available storage, you may
add an optional SD (Secure Digital) memory card, with 4GB or lower capacity. Do not use “MMC” cards, which
look similar to SD cards. The card is inserted into the slot (M) on the left side of the scope (pull out the rubber
cover ap-please refer to the “Parts & Controls Guide” page), label side up with the “notched” corner on the
right as indicated by the card icon below the slot. Note: be sure the power is turned o before inserting or
removing cards to prevent possible loss of les or damage to the card. A new card will not require formatting,
but a card that has been previously used in other devices (cameras, mp3 players, etc) should be formatted
by the ImageView scope before you start taking photos (see the “Setup Menu” section for details). Note that
formatting will erase all les previously stored on the card, so be sure they have been downloaded and
saved on your computer rst if you wish to keep them.
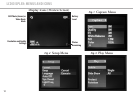
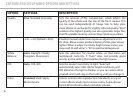
Setting the Date and Time/Date Stamp Feature
You may want to go into the main options menu and set the date and time before beginning to take photos,
so that it will be correct if you want to imprint it on your photos (if so, you must activate that option in the
Capture menu, as the default is “No (date or time) Stamp” . To set the date and time:
Raise the LCD display 1. (G) and press the ON/OFF (A) button.


Find Your Products By Category
- TV and Video
- Communications
- Personal Care
- Portable Media
- Computer Equipment
- Home Audio
- Household Appliance
- Car Audio and Video
- Kitchen Appliance
- Fitness & Sports
- Musical Instruments & Equipment
- Power Tools
- Marine Equipment
- Lawn and Garden
- Automotive
- Photography
- Video Game
- Laundry Appliance
- Outdoor Cooking
- Baby
- Cell Phone
Please Login
